Category Archives: budget

pantry picnic

If you live on the East Coast, you know Mother N. hit the fast-forward button straight from winter to summer. I’m rocking sundresses on a daily basis these (80-degree) days and ready to eat outside. Andrew and I have re-opened Cafe Lindrew for the season—that is, our little stone patio looking out to the woods. This week has been barbeque with cousins and Mickey Mouse birthdays, and Happy Hour on the patio with the hubs (yuengling for Andrew, textbook for me).

Photo & Video Sharing by SmugMug Photo & Video Sharing by SmugMug Photo & Video Sharing by SmugMug

Isn’t it clear it’s time to get outside for some Vitamin D? In keeping with our humble canned-food quest, here’s a two-minute slaw to take on your next picnic—even if it’s in your backyard. Yes, I realize the contradiction: canned food + a $150 food processor? A big ol’ food processor makes this salad lightening-fast. In case you don’t have a large food processor, you could make this in batches in a small $14 food processor, or just chop up all the ingredients and stir in a big bowl! I never have luck with these hand choppers, but this slaw is the perfect use for one if you’ve got it!

I was missing several ingredients (indicated below) and this was still delightful—like the chicken salad solution for vegetarians. A surprising hit in both the teacher’s lounge and my hubby’s sneak taste-test. “Wow, that smells awesome,” he said over my shoulder. “Am I allowed to have some?” Don’t mention it’s missing meat 😉

Chunky Artichoke and Chickpea Salad

Vegetarian Times, serves 6

For a spring picnic or lunch, serve this dish as a dip with crackers or spread on pumpernickel and top with tomato.Or enjoy with your favorite sandwich (apple and cheddar). Don’t freak out at the number of ingredients until you see how many steps follow.
1  16-oz. can / jar artichoke hearts packed in water, drained
1  12-oz. can chickpeas, drained and rinsed
¼ cup chopped onion
¼ cup chopped cornichons (French baby pickles)—I used a bread & butter spear
¼ cup chopped green bell pepper
¼ cup chopped fresh celery
¼ cup vegan mayonnaise (I used regular Hellmans)
2 tsp. olive oil
1 tsp. capers (I omitted)
1 clove garlic, minced (1 tsp.)
1 tsp. seafood seasoning, such as Old Bay (I omitted)
1 tsp. Dijon mustard (I omitted)

Pulse all ingredients in food processor until chunky. Season with salt and pepper, if desired. Chill at least 30 minutes, or overnight.

Photo & Video Sharing by SmugMug

Photo & Video Sharing by SmugMug

Thank you Vegetarian Times for the nutrition facts! Per 1/2-cup serving (note the majority of the fat is not saturated):

Calories: 148, Protein: 5 g, Total Fat: 9 g, Saturated Fat: 1 g, Carbohydrates: 17 g, Cholesterol: 2 mg, Sodium: 435 mg, Fiber: 6 mg, Sugar: 3 g

Leave a comment

Filed under budget, dinners, health, lickety-quick, small bites

a salad to weather the weather

It’s April, and I find myself discussing “Spring” with the kindergarteners each day. Spring, however, is a confusing concept on the east coast of the United States of America in the year Two-Thousand Thirteen.

Last week was Spring Break; I spent three days in the mountains with my in-laws and the remaining weeks shivering with my folks at the beach.

Spring break day one (at a magical mountain cottage) looked like this:

Photo & Video Sharing by SmugMug

Photo & Video Sharing by SmugMug

our NEIGHbors

Spring break day two looked like this:

Photo & Video Sharing by SmugMug

Photo & Video Sharing by SmugMug

Photo & Video Sharing by SmugMug

Last week I wore short sleeves to work; the following night’s forecast was sleet and flurries. This weather certainly leaves one stumped about dinner. Something potato-laden, bubbling with cheese? Or shaved asparagus with lemon, crisp and chilled? Here’s a very special salad featuring some buttery comfort from the oven and simple fresh veggies.

$19 mandolin
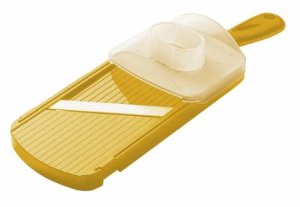
FIRST, SECRETS TO A SUPERB SALAD: I get lots of compliments from guests about my salads, and this is the real texture secret: a mandolin. I have a $10 mandolin from Home Goods and love using it to slice peppers, apples or pears to toss with salad greens, lemon juice and olive oil (those last ingredients are Secret Number Two). The salad is uniformly thin, fork-friendly and crisp. No more salads weighted down with thick cuts of carrots and radishes that require endless chomping. I used my mandolin (carefully, so carefully) to quickly slice the onions and bell pepper for this recipe. You can find a mandolin at Target, Wal-Mart, TJMaxx, Amazon, etc. (Other kitchen essentials here).

Andrew and I loved this restaurant-quality dressing, exciting enough to enjoy the salad for two dinners—and use up the leftover buttermilk for fruit-topped pancakes on night three.

Time-saver Note: I whipped up Trader Joe’s Cornbread Mix in two minutes and baked this while prepping the remaining salad. I have still included a from-scratch cornbread recipe I’ll try on a weekend 😉

Corn Bread Salad

Adapted by Deb from The Lee Bros. Southern Cookbook

1 recipe Crispy Corn Bread (below) or 3 cups of 1-inch cornbread cubes
1 1/2 pounds ripe tomatoes (4 to 6 medium or halved cherry tomatoes)
6 cups roughly torn sturdy fresh lettuce, such as Bibb, butter or Boston
2 cups bitter greens, such as arugula (crucial!)
1 red bell pepper, thinly sliced
1 large Vidalia onion, trimmed, peeled, sliced crosswise as thinly as possible and separated into rings
1 recipe Buttermilk-Lime Dressing (below)

Photo & Video Sharing by SmugMug

Preheat oven to 250°. Scatter the corn bread in a single layer on a half-sheet pan and bake until the pieces are lightly toasted, about 7 minutes.

Photo & Video Sharing by SmugMug

Chop the tomatoes with the skin on. Place lettuce, greens, 3 cups of toasted corn bread, onion and tomatoes to a large bowl and toss to combine. Drizzle with buttermilk dressing, season with salt and pepper, and toss again. Serve immediately.

Photo & Video Sharing by SmugMug

Deb’s do ahead tip: If you’re making this for a picnic or pot-luck — and oh, you should — she suggests keeping the croutons in one container, the dressing in another and the salad mixture in a third; this is best freshly assembled, or in the 30 minutes after.

Buttermilk-Lime Dressing
Adapted by Deb from The Lee Bros. Southern Cookbook

3/4 cup whole or lowfat buttermilk
5 tabespoons freshly squeezed lime juice (they say from 3 to 4 limes; I only needed 1 1/2)
2 tablespoons olive oil
1 tablespoon apple cider vinegar (optional, this was my addition to give it more zing)
1 tablespoon honey
1/4 cup finely minced fresh basil
1/4 cup finely minced fresh flat-leaf parsley
1/4 cup finely minced green onions
1/2 teaspoon salt, plus more to taste

Photo & Video Sharing by SmugMug

Whisk all of the ingredients together in a small bowl until combined. Can covered tightly and stored in the fridge up to two days.

Note from Lindsey: I kept this hand-chopped and chunky, but I think it would be creamier (and faster) in a blender. Since this is a repeat recipe, I plan to puree next time. This recipe is a fabulous twist on my favorite couldn’t-be-easier salad, Panzanella. Try it here.

if you’re not making the cornbread from a mix, read on…

Thin, Crispy Corn Bread
Adapted by Deb from The Lee Bros. Southern Cookbook

1 tbsp unsalted butter
1 1/2 cups stone-ground cornmeal
1 teaspoon baking powder
1 teaspoon baking soda
1/2 teaspoon salt
1 teaspoon sugar
1 large egg
1 1/2 cups whole or lowfat buttermilk (whole is preferred, here’s how you can make your own)
2 tablespoons unsalted butter

Preheat the oven to 450°F. Grease a 12-inch skillet with one tablespoon of the lard or butter, leaving any excess in the pan, and place it in the oven.

In a large bowl, whisk the dry ingredients together. In a medium bowl, whisk the egg until frothy and then whisk in the buttermilk. Add the wet ingredients to the dry ones and mix thoroughly. Melt the remaining butter in a small skill (or your microwave) and whisk the butter into your batter.

While the fat in the large skillet is smoking, carefully remove the skillet from the oven and swirl the fat around to coat the bottom and sides evenly. Pour the batter into the skillet; it should “sizzle alluringly”, says the Lee Brothers. Bake for 15 minutes, or until the top of the bread is golden brown and the edge has pulled away from the side of the skillet. Remove from the oven and either serve hot, in six wedges, or let cool and reserve for Corn Bread Salad (above).

Leave a comment

Filed under budget, dinners, health

origanum majorana

Marjoram sounds like the name of a homely, studious girl in your mother’s eighth grade biology class.  I don’t know about you, but the scientific classification for the herb Marjoram, origanum majorana, sounds like a naughty phrase from the boy’s locker room. Utter its cousin, origanum vulgare, and it’s study hall for you.

However you like to address fresh herbs, I have a spunky friend for your new pal Marjoram. Oregano is her sneak-out-the-window older sister, so the same flavor rules apply. If you’ve visited A Pear to Remember before, cue palm-to-forehead smack as I gush over eggplant and feta YES SERIOUSLY AGAIN. (I find affordable, abundant varieties of eggplant at Korean/Latino grocers, discussed here).

Photo & Video Sharing by SmugMug

Andrew is a newly inducted member of the eggplant fan club and still weary of initiation rituals. When it’s not breaded or covered in cheese, eggplant in-the-nude lingers suspiciously longer on his fork on the slow ascend to his mouth. He liked this salad. Really, genuinely liked this salad. I like to think the Andrew-Stamp resides in the same circle of Kid’s Approval since, let’s face it, men aren’t always so excited about new veggies.

If you thought eggplant was only for Italian food, well, obviously you’re new here. Even if you’ve cooked it twelve ways, here’s a strikingly simple Middle Eastern salad for your expanding culinary repertoire.

Spinach Salad with Grilled Eggplant and Feta

from Gourmet, June 2009

serves 4 as a main dish, 8 as a side

1/2 cup extra-virgin olive oil

1/4 cup fresh lemon juice

1 teaspoon minced garlic (I’ve got a sexy Brit to show you how)

2 teaspoons chopped marjoram or oregano

1 (1 1/4-pounds) eggplant, trimmed and cut into 8 (1-inch-thick) rounds (here’s how)

10 ounces baby spinach

1 cup crumbled feta (1/4 pound)

1/4 cup pine nuts (1 ounce), lightly toasted

Prepare grill for direct-heat cooking over hot charcoal (high heat for gas); we use this stovetop fellow year round. Whisk together oil, lemon juice, garlic, marjoram, 1/4 teaspoon salt, and 1/8 teaspoon pepper in a small bowl.

Photo & Video Sharing by SmugMug

Brush both sides of eggplant slices with some of dressing. Season with 1/4 teaspoon each of salt and pepper—you know, pinch it, don’t fret over measures. Oil grill rack, then grill eggplant, covered only if using a gas grill, turning occasionally, until tender, 12 to 15 minutes total. Cut into pieces.

Photo & Video Sharing by SmugMug

Photo & Video Sharing by SmugMug

Toss spinach with enough dressing to coat and season with salt and pepper. Add eggplant, feta, and pine nuts and toss again.

Photo & Video Sharing by SmugMug

Photo & Video Sharing by SmugMug

Serve atop fluffy couscous and sprinkle with some baby tomatoes. I imagine this salad would gladly accept an invitation from my juicy roast chicken to get together after school and “study”.

1 Comment

Filed under budget, dinners, health

the can-can gratin

My food snobbery diminishes by the day. I like to think.

In the past eight months, I visited six food banks—even as recent as yesterday. I’m learning how they operate, feed, support, and educate the hungry working poor they serve. In two weeks, I get to demo “creative cooking with canned spinach” at an incredible food bank in Maryland with a strong Nutrition Education emphasis. It has me thinking about canned food—where and how it has a place in the American diet.

In my blog profile, I reference my soggy canned corn/green bean childhood. (Allow me to mention here that I was raised in a loving, stable, incredible family and blessed to have canned vegetables as my main complaint). Indeed, my fresh-food-filled adulthood has thus far proven crunchy and delightful. I love witnessing how many food banks are providing seasonal produce to their clients when there are abundant markets. They wisely save canned products for colder seasons. Some local food banks are even sorting canned produce by nutrient priority: orange vegetables, beans, low-sugar fruit, low-sodium soup.

Canned vegetables are not ideal: fresh and frozen are more nutrient-dense and contain less sodium. However, my feelings here resemble my feelings toward the organic-local movement. That’s great if you have access to fresh, local, organic foods. That’s seriously awesome you can afford it. I, in fact, envy this privilege—my farmer’s market has been beyond our budget for the past two years. Hunger is a real and prevalent problem for more Americans than we imagine. Yes, canned vegetables are more susceptible to BPA and sodium. But for thousands of families living within ten miles of me, rent payments and medical bills take precedence over seemingly invisible issues like BPA.

It’s important to note that I don’t believe for a minute economically disadvantaged families should have to choose between nutrition and every other financial matter. I find it appalling it’s often acceptable to donate our leftovers and junk food to “the poor”.

As I am turning my own home into a novice test-kitchen for interesting and healthy canned-food recipes, it only seems appropriate to revisit this dreamy artichoke gratin I made in Brennan and Alejandro’s kitchen. Oh yes, a gratin—pronounced gre-tan—from a can.

Artichoke Gratin

from Plenty, serves 4-6

2 pounds frozen artichoke hearts (sold out, so I used 32 oz. canned in water, rinsed well)
4 lemons, grate zest and reserve juice
2 medium onions, thinly sliced
1/4 cup olive oil
salt and pepper
3 tablespoons thyme, chopped (the thyme is crucial!)
6 tablespoons flat-leafed parsley, chopped (I omitted the parsley)
4 tablespoons unsalted butter
1/3 cup plus 1 tablespoon all-purpose flour
2 cups milk (lower fat is great)
3/4 teaspoon salt
3/4 cup ricotta
6 tablespoons parmesan, grated 

Place frozen artichoke hearts in a large pot and cover with water. Add the lemon juice to the pot. Bring to a boil and simmer for 5 minutes or until tender. If using canned artichokes, no need to boil just rinse well. Drain.

Photo & Video Sharing by SmugMug

While artichokes are cooking, heat saute pan over medium heat and add olive oil. Add onions and some salt and pepper. Saute 15 minutes or until golden, stirring occasionally. Add cooked onions and artichoke hearts to a bowl and mix with lemon zest, thyme and parsley. Add salt and pepper as needed.

Photo & Video Sharing by SmugMug

Preheat oven to 375 degrees.

Melt butter in a medium saucepan over medium heat and then add the flour. Stir mixture constantly for 2 minutes. Add milk slowly, whisking as you pour. Add salt and whisk on low heat for 10 minutes or until sauce is thick and creamy. When the sauce coats the back of a spoon, it’s good to go—give it a taste (I like to add an extra tablespoon of parmesan into the sauce at this point).

Photo & Video Sharing by SmugMug

Mix bechamel—the groovy french word for the white sauce you just made—with the artichoke mixture.

Photo & Video Sharing by SmugMug

Lightly grease a medium-sized casserole dish and pour in mixture. Make small holes in mix and drop in teaspoons of ricotta. Cover with foil and bake for 30 minutes.

Photo & Video Sharing by SmugMug

Increase oven temperature to 400 degrees and remove foil. Top gratin with Parmesan. Continue baking for 20 minutes or until golden brown and bechamel bubbles. Remove from oven and let sit for 10 minutes. Serve warm. Photo & Video Sharing by SmugMug

The thyme is a surprising match to the artichokes—and believe me canned vegetables deserve to be featured in such a decadent meatless entrée. Even Andrew and Alejandro—carnivores of carnivores—scarfed up spoonfuls. The best part? Company in the kitchen.

Photo & Video Sharing by SmugMug

For more recipes from the cookbook Plenty, check out this zucchini pasta and this unforgettable yogurt-pomegranate eggplant.

Leave a comment

Filed under budget, dinners, health, here to share

emerging from hibernation

Good evening readers and eaters! As I mentioned two posts ago, I have an exciting life project that occupies my evenings—hence the lack of recent recipes. I have indeed been cooking and photographing lovely meals to share with you. Warning: this blog is about to grow in its proportion of heart-healthy, veg-filled delights.

Andrew and I are really cutting back on saturated fats these days: it’s not about a fad diet or vegan trends. As we venture into our fifth year of marriage, we’re unhappy with the weight gain we’ve experienced in this brief time—over 20 lbs. between the two of us. Neither of us is overweight, but 20 lbs. in 5 years is a scary trend considering the inevitable metabolic slow in the coming 5 years. A generous topping of high-fat cheese was making its way into too many of our meals.

My two years immersed in Nutrition grad studies taught me that the most realistic way to weight loss is small, simple dietary substitutions. One less soda a day, less fattening milk, etc. For Andrew, this meant switching from sandwiches to soup for most workday lunches. For me, this meant cut-up fruits and veggies as snacks before meals insteaPhoto & Video Sharing by SmugMugd of my infamous feed-a-family lunch portions. Smaller portions, more frequent meals. Now Andrew eats breakfast. We eat smaller dinners and finish the evenings with yogurt fruit smoothies.

So now I must share my thrilling very-recent discovery: ethnic markets. I had heard about the affordable produce prices for years, and finally visited my local Korean and Hispanic supermart. Not only were the prices one-third of what I paid at Shoppers (which I had found less expensive than my other local chains), but the produce was fresh, abundant, and varied beyond my imagination. Where Shoppers has carried three to four moldy eggplants the past five months, Fresh World had hundreds of firm, blemish-free eggplants—five different varieties! I realize I am spoiled in my metropolitan area, but if you have the opportunity to explore an international market, this is a wonderfully affordable way to incorporate far more fresh ingredients into your meals. I left with seven stuffed produce bags  for barely $40.

Sometimes, we’ve just got to stop complicating dishes with steps and stress. Have a simple, fresh meal. Give yourself a break, your body a boost. Here was our light Friday night…Photo & Video Sharing by SmugMug

Pita and Feta with Vegetables

inspired by Yotam Ottolenghi’s “Very Full Tart” recipe (minus eggs, heavy cream, buttered pie crust)

do substitute/omit ingredients per availability

1 red bell pepper, chopped

1 yellow bell pepper, chopped

1 medium eggplant, peeled and diced

handful cherry tomatoes, halved

1 sweet potato, peeled and diced (1-inch)

1 zucchini, diced

1 large onion

4 tbsp. grapeseed/vegetable oil

4 oz. feta, crumbled

whole wheat pita for serving, cut into wedges

Preheat the oven to 400F. On at least two baking sheets, scatter the chopped vegetables into an even layer. Drizzle with oil and toss to coat. Sprinkle with dried thyme or oregano as you like. Roast the veggies about 30 minutes, tossing halfway through, until potatoes are fork tender and browning occurs. Season with ground pepper and sprinkle with feta. If you have fresh oregano or chives, add them here.

Photo & Video Sharing by SmugMug

We spooned this vegetable mixture into whole wheat pita pockets, dunking the pita into homemade baba ganoush as well. Surprisingly satisfying.

2 Comments

Filed under budget, dinners, health, the basics

greetings and bean-ings!

Hi friends, I’ve missed you, too! Where have I been? I have an exciting life-project (which may involve me reading 22 books) that I can’t reveal for some time—sorry for the necessary suspense. How have you been?

Here’s the quick catch up on me since August…

Andrew and I celebrated our fourth wedding anniversary at our favorite B&B

Image

I chopped my hair off (my students love the fairy resemblance)

Image

My sweet sister-in-law got engaged (while I snapped, surprise!, 201 photos)

Image

For Andrew’s 27th birthday this month, we threw a wildly successful Mad Men party (where Andrew had this genius idea to have everyone else bring the food)

Image

I honored my Grammy’s memory with her kick-ass thanksgiving stuffing

Image

And, kind of personal, but it’s been nearly 300 days since my last sinus infection so I lovvvvvvve being chronically healthy now (thank you, Symbicort) and in the kitchen every day!

Image

I realize last time I dropped in to chat, we were discussing corn, but the weather demands we move on. I don’t know where you live, but Virginia had a sunny, 60 degree Thanksgiving day quickly turned blistery-cold weekend. Let’s warm-up and snuggle up with a hearty, healthy dish before the neighbors start delivering cookies…

Image

Fresh herbs are vital in this simple stew, trust me. And grab a big, fresh, cheesey loaf of bread to scoop up every last drop.  We serve this with Trader Joe’s Alpine Gruyere bread. Click on the highlighted words should you like a demonstration on technique. In this dish, don’t concern yourself with precise vegetable measurements; the more veggies the tastier.

Tuscan White Beans

Adapted from Ina Garten, serves 6… or amazing leftovers

1 pound dried white cannellini beans, cooked (or about 4 15 oz. cans; I have always used canned)

3 tbsp. olive oil

2 cups chopped carrots (4 carrots)

1 red bell pepper, diced

1 tablespoon minced garlic (3 cloves; note jarred minced garlic will be too potent in this dish)

1 to 2 cups chicken or vegetable stock (I love the rich flavor of Pacific Organic)

1 tablespoon minced fresh rosemary leaves

2 teaspoons kosher salt

1/2 teaspoon freshly ground black pepper

1/2 cup freshly grated Pecorino Romano cheese (or aged cheese like parmesan)

Image

Rinse and drain the white beans. Heat the olive oil in a large pan or Dutch oven over medium heat. Add the pepper and carrots, and sauté for 8 to 10 minutes, stirring occasionally, until tender. Add the garlic, and cook for 1 minute more. Add the beans to the vegetables.

Image

Add 1 cup of the stock, rosemary, salt and pepper, and simmer, stirring occasionally, for 12 to 15 minutes, until creamy.

Image

Stir in the Pecorino, season to taste, and serve hot with fresh bread. We’ve never used spoons.

Image

1 Comment

Filed under budget, dinners, health, here to share, lickety-quick

corn off the cob: barley risotto

Welcome to a new summer series on A Pear to Remember: corn. Corn is not so exciting—or appealing—when processed for sandwich bread, condiments, granola bars, candy. But let’s consider an ear of corn picked from tall green fields: a 63-calorie vegetable with less than 1 gram of fat, 2.4 grams of protein, and 8% of our daily requirement for dietary fiber. Not so evil.

Sure, we could boil cobs to death and slather with butter. Or, we could slice off the kernals for something a little more exciting. Risotto would not be my go-to summer dinner, unless we’re stirring in seasonal herbs and veggies. The wonderful thing about substituting barley (a fiber-packed whole grain) for arborio rice is how much better it holds up to the cooking process. Risotto is lovely, but there is a fine line before arborio rice becomes thick, gummy and impossible for leftovers. Barley is hearty, more forgiving, and stands up to reheating for lunch. And risotto need not be intimidating: pour, stir, pour, stir, pour and stir under tender—you can do it. Play music, relax.

everyday food, barley risotto, corn, basil, a pear to remember

Here is a substantial summer supper, and a new use for your basil bush beyond pesto.

Barley Risotto with Corn and Basil

from Everyday Food, serves four

1  32 oz. carton reduced-sodium vegetable broth

2 tablespoon olive oil

1 medium onion, finely chopped

coarse salt and ground pepper

1 cup pearl barley

1/2 cup dry white wine

corn kernels from 3-4 ears or 10 oz. package frozen corn kernels

2 cups packed fresh basil leaves, torn into small pieces

1/2 cup grated (about 2 ounces) Parmesan cheese, plus more for serving

trader joes, vegetable broth, low sodium

In a medium saucepan, bring broth plus 4 cups water just to a simmer. Meanwhile, heat oil in a large saucepan (or Dutch oven) over medium heat. Add onion, 2 teaspoons salt, and 1/4 teaspoon pepper; cook, stirring occasionally, until onion is softened, 4 to 5 minutes.

Add barley; cook, stirring constantly, 1 minute.

quaker brand, barley

Then add wine; cook, stirring, until evaporated, about 1 minute.

Add 2 cups hot broth mixture; simmer, stirring occasionally, until almost absorbed, 10 to 12 minutes. (I find it’s better to leave a little broth-y than to let the grains overcook and dry out).

Continue adding broth mixture in this manner until barley is tender and mixture is creamy, 40 to 50 minutes (you may not have to use all the broth, but I save it for re-heating the next day). Add corn; cook just to heat through, 4 to 5 minutes.

Stir in basil and Parmesan; season with salt and pepper. Serve immediately, with extra cheese.

My servings may look a little corn-heavy (I used four ears!), but it was sweet, crunchy corn I (literally) purchased in the middle of a field from an overall’d Delaware farmer and I wanted to use every last bit.

1 Comment

Filed under budget, dinners, health, techniques

pizza: it’s what’s for dinner

Let’s get in the mood with a scene from a beloved childhood film. In this clip from Back to the Future II, we glipse at the McFly family in the Future: the year 2015. Ha!

I am impressed the writers in 1987 foresaw caller ID. Still waiting on Black & Decker to release The Hydrator.

Yes, it’s a cherished dish since I was born in the 1980s when Mom, Dad, Jason and I would lay the picnic blanket on the family room floor to watch TGIF around a piping hot pizza box. Even on a scorching summer night, 26 years later, pizza is still the ultimate end-the-week dinner. Now that I’ve wrapped up nutrition classes, it seems an apt time to talk about up-ing the nutrient value of our favorite foods. Let’s start perfecting the pie.

OVERLOAD

Carry-out pizza, despite the presence of carbs, veggies, dairy and in one serving, can be nutritionally void and calorically perilous. Fat and salt reign. The sodium overload in the sauce, pepperoni, and cheese cancels out much hope of absorbing calcium. Pizza also often lacks fiber so crucial to our diet; I found a way to include it in my version, with a flavor just as appealing.

RETHINK PIZZA

What do we love about pizza? The crust’s crunch, rich tomato flavor, the alluring salty cheese? Here’s just one way to enjoy this essence without sacrificing our heart’s health. Using an appropriate portion of salty cheese provides ample cheesiness and significantly decreases the saturated fat. I added toppings high in vitamins, low in calories—then baked it to that golden brown we all adore.

Heart-Healthy Pizza

A  Friday Night Linvention

1 cup baby spinach leaves (use arugula for peppery kick)

1 cup mixed basil and mint leaves

2 tbsp olive oil

1 cup cherry tomatoes, halved

1 bell pepper, sliced thin

½ cup shaved parmesan cheese (pecorino, romano, asiago are all great options)

1 prepared pizza crust (mine was only about 9 inches diameter; whole wheat is a great choice)

budget tip: purchase a wedge of romano or asiago cheese and shave with a vegetable peeler. this can be several dollars less than pre-shredded parmesan.

Note the sodium per serving size on this Trader Joes’ pizza crust! It would have been all too easy to eat this entire pie. It’s not just about fat: it’s about the whole picture.

Preheat the oven to 450F.

In a food processor (a 2-cup machine is sufficient), puree the spinach and herbs with 2 tbsp olive oil. If you don’t have a food processor, finely chop all of greens and stir into the olive oil. A traditional pesto with nuts and cheese would add much more fat than I desired here.

Spread the pesto over the crust. Place the tomatoes, cut side up, on the sauce along with the peppers. Sprinkle a pinch of kosher or sea salt over the tomatoes—this will help them roast in the oven. Scatter the cheese in between the tomatoes and peppers, leaving the tomatoes exposed.

Bake directly on the rack according to the crust’s package directions, or until the cheese browns. I place a large baking sheet beneath the pizza to catch any dripping oil or cheese as it bakes. Cool slightly before cutting; I prefer a long knife instead of a pizza wheel.

Other ideas:

Rather than high-sodium pizza sauce, top your crust with thin slices of salted beefsteak tomatoes (and herbs if you like) and bake until the tomatoes begin to dry out. Top with ½ cup of salty cheese, and the veggies/meat of your choosing and bake until brown. Of course, the tricky part is not eating the whole pie! Serve with a salad and munch on fruit or nuts before dinner. Eating a salad (tossed with peaches or berries) while our pizza is in the oven helps with smaller portions.

Pizza is a favorite is our home, and we’re always playing around with new ways to make it memorable in our own kitchen. Find more pizza inspirations here and recent medical news on life-saving fiber from the American Journal of Clinical Nutrition.

2 Comments

Filed under budget, dinners, health, lickety-quick

france’s third favorite dish

Pardon my absence, I’ve been graduating. And resting. And eating out. Now that I’ve completed my graduate courses in Nutrition, I feel hyper-aware of my responsibilities to promote good health—especially in my own kitchen. That’s why we’re talking whole grains today in their most loveable form. If you’re not aboard the couscous train, allow me to introduce this fluffy five-minute grain as your new weeknight wonder. Yes, a 2011 study published in Vie Pratique Gourmand showed couscous to be the third favorite dish of French people. And first place in East France! Oui.

Polish-raised folk—such as myself—can rarely resist a potato recipe. And when I saw this recipe as Vegetarian Time’s “top pick” for the April issue, I tested it in my own kitchen. If you don’t have these spices on hand, you will find plenty of excuses to use them in my favorite Eastern recipes. For a little bit of chopping, and 20 quick minutes, this simple dish offers a hearty reward.

Try this out on the deck with fresh pita and minty iced tea. Happy end-of-spring.

Quick Moroccan Tagine

Vegetarian Times April 2010, serves 6
Note: you can serve this spice-laced North African stew over bulgur, couscous, or rice.

Spice Blend

2 tsp. ground cumin

1 ½ tsp. sweet or smoked paprika

1 tsp. ground ginger (I didn’t have this, it was fine!)

½ tsp. ground turmeric

¼ tsp. ground cinnamon

Tagine

2 Tbs. olive oil

1 large leek, cut into 1-inch-thick rounds (watch prep tips here)

1 medium red bell pepper, cut into 1-inch triangles (how to cut bell pepper)

4 medium potatoes, scrubbed and halved (redskin or yukon gold)

1 ½ cups cooked chickpeas (or 1 15-oz. can, rinsed and drained)

2 cloves garlic, minced on a microplane or grater (2 tsp.)

8 dried apricots, quartered

½ cup dry-cured black olives, optional

¼ cup chopped cilantro

1 cup whole-wheat couscous

To make the spice blend, combine all ingredients in small bowl.

To make Tagine: Heat oil in pot over medium-high heat. Add leek and bell pepper; sauté 3 minutes.

Add potatoes, chickpeas, garlic, and Spice Blend; cook 30 seconds.

Stir in apricots, olives (if using), and 2 cups water; season with salt and pepper, if desired.

Cover, and bring to a boil. Reduce heat to medium-low, and cook 20 minutes, or until potatoes are tender (my red potatoes were tender in 10 minutes).

While the vegetables are simmering, make the couscous: heat 1 cup water (or chicken broth) until boiling.

Once boiling, stir in 1 cup dry couscous. Cover and remove from heat. Let the couscous steam for five minutes. Regardless of the serving size, couscous always takes five minutes (glory be!). After the couscous steams, fluff gently with a fork.

Spoon the couscous into a bowl and top with the vegetables and sauce. Serve sprinkled with cilantro.

Leave a comment

Filed under budget, dinners, health, lickety-quick

sweet nothings

Last time, I was talking about a sweet discovery. Today, I offer another—an indulgent recipe this nutrition student makes once every other year 😉 Because there is nothing nutritious about this dessert—perhaps dessert’s very definition? I served this as an easy end to a gourmet family dinner. This was everyone’s facial response to my announcement:

Salted Brown Butter Crispy Treats

Smitten Kitchen, makes 16 2-inch squares or 32 1- x 2-inch small bars

4 ounces (1/4 pound or 1 stick) unsalted butter, plus extra for the pan

1 10-ounce bag marshmallows

1/4 teaspoon coarse sea salt

6 cups Rice Krispies cereal (use slightly less than half a 12-ounce box)

Butter (or coat with non-stick spray) an 8-inch square cake pan with 2-inch sides. I use a 9 x 13 glass pyrex.

In a large pot, melt butter over medium-low heat. It will melt, then foam, then turn clear golden and finally start to turn brown and smell nutty.

Stir frequently, scraping up any bits from the bottom as you do. Don’t take your eyes off the pot as while you may be impatient for it to start browning, the period between the time the butter begins to take on color and the point where it burns is often less than a minute.

As soon as the butter takes on a nutty color, turn the heat off and stir in the marshmallows. The residual heat from the melted butter should be enough to melt them, but if it is not, turn it back on low until the marshmallows are smooth.

Remove the pot from the stove and stir in the salt and cereal together.

Quickly spread into prepared pan. Use a buttered piece of waxed or parchment paper to press it firmly and evenly into the edges and corners.

Let cool, cut into squares, get ready to smile. Ah, nostalgia.

Leave a comment

Filed under budget, dessert, lickety-quick